Showing posts with label reconstruction. Show all posts

Tuesday, April 2, 2013

Curtains to Rug

I usually don't have a hard time letting material things go.  It's just stuff, after all.  So when it came time to replace my daughter's bedroom curtains, I didn't hesitate.  My mom was here, and volunteered to make new ones.  Done. 

The old curtains were ones that I had made during my "nesting" phase while pregnant, 8 years ago, which feels like another lifetime.  Cute bright green with hot pink, topped with ribbon.  I even made floor pillows to match.  The curtains hung in her nursery in San Francisco, made the move to Utah with us, and eventually were hung in her bedroom here in Cozumel.  The tropical sun had faded the material pretty badly, so it was time.  But once the curtains were down, I couldn't bring myself to just throw them out.

Faded panel #1
 I had 2 of the curtains above.  I took off the ribbon, as it was still in pretty good shape, and I have a ribbon addiction problem, so into the stash it went.
Ripped up curtains
 I cut 1"-2" snips into the bottom of the curtains and started to rip them into a huge pile of strips.

And started to braid...
 I took 3 strips of material and started to braid, simply running a couple of stitches through the ends.  I soon realized that this project was going to take awhile to complete...

The finished pile.
 I estimate it took about a week to get all of the strips braided together.  I mainly worked on it at night while watching TV.

Leo Cat loves helping with projects...
 I began the spiral and hand sewed a couple of stitches to get things started.

 I then moved things over to the machine and started sewing.  I used a large zig zag stitch, and just kept sewing and sewing and sewing...

DONE!
 The edges kind of curled up on me, not sure why, but maybe I was stretching the material while sewing?  Who knows.  I tried ironing the edges down, and I washed it, but still curly.  Oh well.

New little rug for the reading corner. with matching pillows!
Overall, pretty pleased with my reuse of the old curtains.  I wish the rug would have turned out a little flatter, but the princess didn't seem to care.  She told me it looked like a flower.

Until next time, thanks for stopping by!

Wednesday, March 20, 2013

Simple Knit Skirt From a Huge Tank Top

I'm a sucker for two things.  Well maybe more than two, but I am for sure a sucker for the clearance rack at any store, and I'm also a sucker for knit skirts.

I found this gem of a find at Walmart for a buck.
It's a 5XL cotton/poly blend light-weight knit tank top.  I couldn't leave it there for $1.  Like I said, I'm a sucker.

I wanted to leave the original hem of the shirt intact, as I'm not really a fan of sewing knits, and I'm lazy. So I chopped off the top portion, right under the arm pits.

 I pinned down about an inch for an elastic casing, making sure to leave a couple of inches open to feed the elastic through.


 I sewed a zig-zag stitch, fed the elastic through, and sewed her up, and TA DA...
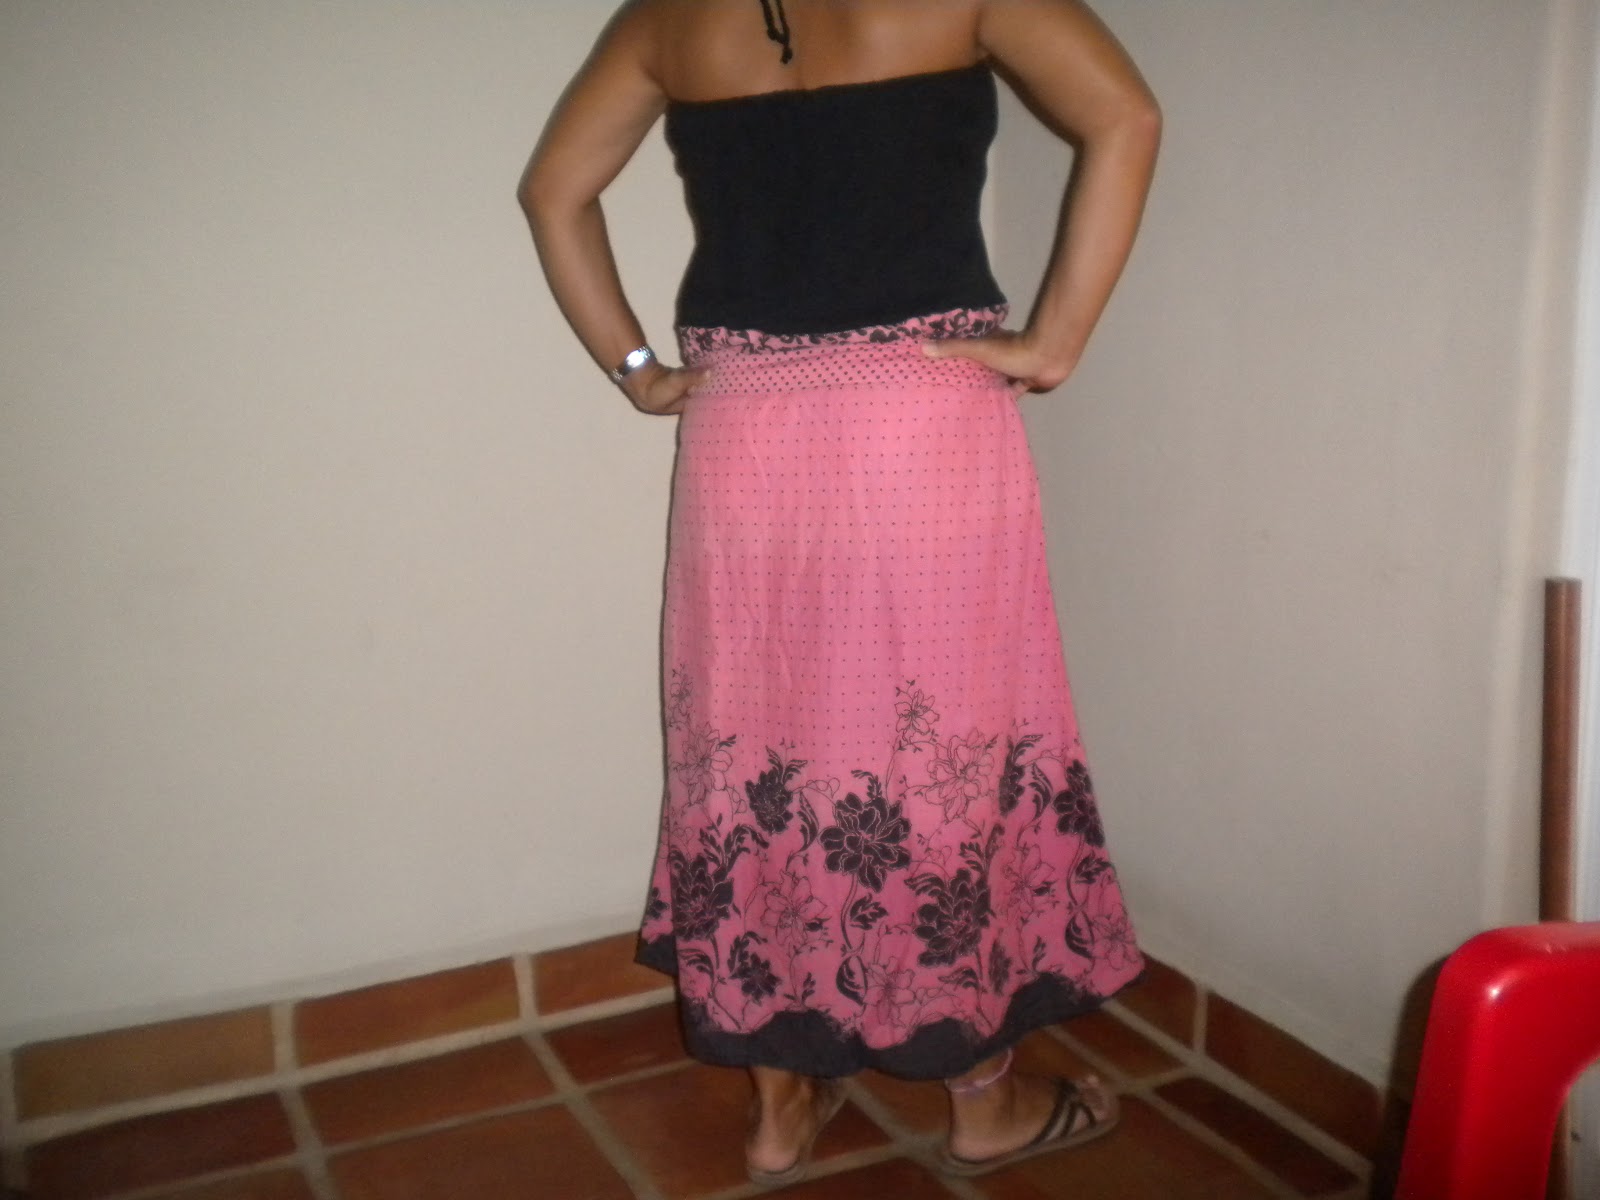
Missing part of my head...

Me.  The awkward model in a breezy knit skirt.
Super easy, cheap, comfy, and cool for the hot summer ahead.  Thanks for stopping by!

Saturday, September 22, 2012

Cute PJs, Too Bad You've Grown

I'm baaaack.  I guess I took a couple of months off.  Don't worry, I've spent the majority of my time off of the blog collecting more project material (aka junk) or pinning things to Pinterest.  Time well spent, no?

I was also able to travel back to the good ol' U.S. of A, and of course while there I came across things at my mom's house that I couldn't bring myself to part with.  Example number one, these super cute PJs.  Originally from Japan, 100% cotton in a SUPER pretty flower and butterfly print.  Perfect, no?  Except they are around a kids' size 3/4.  My kid is 8, so needless to say, they were a little snug.  They were in the donation pile, and I rescued them (you're welcome pretty PJs).

I painstakingly took apart both the pants and the kimono top, and ended up with quite a bit of material to work with.  I decided to make the princess a simple skirt.  I used the pieces from the pants and the back of the top and came up with this:

I still have a couple of pieces of the pretty material left, so I may make something else, as soon as I can figure out what.  Maybe I'll head over to Pinterest :)

So that's what I did today.  It's good to be back.  Thanks for stopping by!

Tuesday, July 3, 2012

Business-ish In The Front, Party In The Rear T-shirt Refashion

The weather is hot, and I have an overwhelming desire to wear as little as possible.  Unfortunately, society dictates that the "mom crowd" should remain clothed (booo).  I'm not sure if there is an age cut off for open back t-shirts.  If there is, screw it, I need air flow.

I sacrificed a long sleeve t-shirt that I've had since before the princess was born.  Yikes, about 8 years.
Sacrificial long sleeve T
I proceeded to chop off the sleeves.
Fresher already.

 I also cut a straight line up the middle of the back of the shirt, which of course I didn't take a picture of.

Cut off the seams and cuff of one of the sleeves.

Cut 8 inches long by 4 inches tall.
 Sewed the strips down the back, and bunched the middle together and tied with a piece of scrap.
Also tied the shoulders with more scraps.

Now, when the wind is at my back, I can actually feel it.  Ahhhhh.  Thanks for looking!

Saturday, June 9, 2012

Batik Dress to Flowy Tunic Shirt

People are probably getting tired of me saving things from "the bag that grandma left."  But here's another one.  This time a seemingly worn out batik dress.
The stitching around the neck and hem were becoming unraveled, but otherwise no major malfunctions.

I didn't take any pictures of what I did, but here's my lame attempt at a diagram:

Basically, I cut a square/rectangle, cut a neckline, and sewed up the edges and shoulders, leaving about 9 inches un-sewn on both sides for arm holes.  I finished the hems on the bottom, arms and neckline.  Now I had a shapeless box shirt.  Flattering.

I found a nifty tutorial on how to make simple thread belt loops using your sewing machine, here.  SO easy!  I made a nice belt/sash out of the scraps from squaring up the fabric, and added some side slits at the hips, and...

 A nice, light weight shirt for summer!  I'm pretty proud of this one, and I think I'll make more.  Thanks for stopping by!

Wednesday, June 6, 2012

Mama Mu-Mu, Get Ready For A Romp(er)

Yet another contribution from Grandma's donation bag.  Man, that lady left some good stuff.  This dress started out as an ok light, baby blue color.  I, of course, didn't get a "before" shot of the dress before I dumped it in the pink dye bath.  But the new purple color is nice.
Cotton jersey Mu-mu.

Inside out, ready for chopping.  You can see the light blue stitching that was the original color.

Cut off the sleeves, and chopped straight across the neckline.

I chopped it through the former waistline, and got rid of the front pockets.

I separated the top into 2 pieces, and sewed down the top about an inch on both pieces.

I used an old pair of shorts as a pattern.  Note to self, make 2 cuts next time.  The back pieces need to be a little bigger to accommodate your bootie without being too snug.

Nifty "new" shorts.
Then I apparently got tired of documenting my progress, because I don't have any pictures of my next steps.  Basically I added elastic to the top, front and back portions, and sewed the sides together.  Then I sewed the top onto the bottom portion, and added more elastic to the waistband area.  I made some nifty shoulder ties from the pocket scraps, and...
Strike a pose.
A cute and comfy little romper for my favorite princess.  Thanks for stopping by!

Sunday, June 3, 2012

Scrap Bustin' Cat Toys

What do you get when you combine boob pads from swimsuits, seam scraps and catnip?  Mice!

I've been holding on the the boob pads from my swimsuits for awhile, for some unknown reason.  I remove them as soon as I get a new suit.  Who wants soggy boobs at the beach?  Not me.

Soggy offenders.

I saw a tutorial awhile back for making mice out of shoulder pads, and thought, "finally, those boob pads can have a second life making cats crazy."

Scraps from cutting seams out of other projects, now known as, "mouse tails".

 I pinned up the sides of a boob pad, stuffed a tail inside and sewed around the edges, leaving an opening to turn the mouse right side out and stuff catnip inside.
Little mouse with a hole in front
Fresh catnip.

 After stuffing the little mouse full of catnip, I did a zig zag stitch around the edge and gave him an eyeball.


One down, fifty to go.  We don't have cats, as I'm allergic (much to the princess's dismay), so the local Humane Society will be getting a donation of MICE!  Gotta keep those shelter kitties crazy!

Friday, June 1, 2012

Save a Skirt By Killing a Tank Top

Today I did a super fast and easy transformation for the princess.  She has a cute ruffle skirt in a really fun bright turquoise knit.  The problem?  Too much 7 year old bootie hanging out.  When I told her I could see her underwear, she begged me not to get rid of it.  Sigh, another "favorite" destined for the garage sale bag.  I told her to go change, and she comes out wearing the skirt as a top.  That's my girl.  Refashion that skirt.  It was a little big on top for her, so instead of adding elastic, I made some straps out of a too small tank top.

The bootie showin' skirt.
The sacrificial tank top.

 I braided 3 of the strips together for each strap, and sewed them in place.  And...


Future supermodel working the camera.
 Pretty cute!  Now I can hold off fighting her about getting rid of it.  Until her belly starts to show, at least.

Wednesday, May 30, 2012

Where Old Swimsuits Go To Die, Hair Ties

Today I went through the donation/garage sale bags and closets.  Ugh, it's amazing how much the princess has grown in the 2 years we've been living here.  Also amazing is the number of destroyed swimsuits.  Between the sunscreen, salt water, chlorine, heat and humidity; anything that has elastic or Lycra, rots.  Fast.  So today, I made hair ties and a headband out of old swimsuits.  I found the idea here.  This gal's swimsuit was clearly not as destroyed as what I was working with.
2 little bikinis and 2 one pieces, courtesy of la nena.
All of these suits were pretty baggy, and the elastic around the edges was sticky or crunchy.  The gal in the link above just cut and tied a single piece, which wasn't going to work with these suits.  So I braided 3 strips together, sewed up the ends, tied another scrap around the sewing mess, and...


Ponytail and bun ties galore.

Pay no attention to the greasy hair.  It's hot, ok?
Super easy and fun little project!  I love not throwing things away!  I recently read (somewhere) that 5% of all landfill waste in the US is from textiles.  That's a lot of fabric.  Almost 68 POUNDS per US household per year.  I'm feeling pretty good about keeping these otherwise useless swimsuits out of the dump. 

Thanks for stopping by!

Tuesday, May 29, 2012

Oh Baby-Doll, Sorry I Had to Chop You

Today I made another dress out of the "bag that grandma left".  The original dress was ok.  The boob part was too big on me, and the baby-doll style was making me look pregnant (I'm not).  The tank top was also in the bag.  A little stretched out on the bottom, and a little faded, but in otherwise good condition.
I got my scissors out and started chopping.
See ya too big boobage.


Next, I took both pieces and pinned them, right sides together.  I am going to use the bottom of the tank top as the new top.

 I zig zagged the pieces together.
Notice how the former bottom of the tank is now on top?
 I tried it on and the new tube top was super baggy.  So I cut a small hole in the "hem" of the top and threaded some elastic through the casing.

I also braided some scraps of the black tank and added the former straps of the baby-doll dress as new halter straps.  Added security for keeping the girls off display.


Not bad!  Thanks for stopping by!